Cognitens Opticell

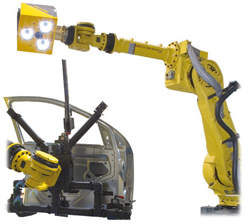
CogniTens OptiCell - Automated 3D Shop Floor Optical Measurement
OptiCell is CogniTens' fully automated 3D optical measurement system designed for supporting on-line recurring measurements of parts and assemblies in the production shop floor environment. OptiCell provides rapid, reliable and comprehensive 3D measurement results required for quality iterations during tryout, production ramp up, quality assurance and dimensional process control.
OptiCell is designed to ensure highly reliable measurements without compromising on measurement throughput, flexibility and ease of use critical for recurring operations.
- Allows planning and programming of detailed measurement programs
- Measures full surfaces, geometric features and edges
- Provides intuitive color map based deviations analysis
- Fully integrated to an industrial cell using common robots
- Digital communication unaffected by industrial conditions
- Offers real time processing of measurement results
- Integrated support for control and safety features
- Generates and distributes measurement results and reports
- Produces high quality 3D model outputs
- Data interfaces to SPC software systems
Reaching meaningful dimensional measurement results faster while preserving the highest standards for accuracy and reliability are at the cornerstone of the OptiCell solution. Leading manufacturers report the following values from deploying OptiCell in their operations:
Higher operational flexibility
- Supports a variety of parts / assemblies from different product programs
- Easy to operate by non expert shop floor workers
- Allows lower part sampling through more comprehensive measurements
- Streamlines part approval for mass production process
- Faster introduction of new assembly processes using detailed dimensional verification
- Supports virtual functional build initiatives
Lower cost of quality
- Up to 50% savings in checking fixtures costs
- Lower sampling per tryout event
- Reduced inspection labor costs with higher automation
- Allows changing inspection points without tooling investment
- Reduces the number of special studies and lay-out panels
- Reduces the number of physical builds using virtual assembly studies
Faster time to market with better quality
- Faster measurement times for large parts and assemblies
- Reduced number of tooling tryout and change iterations
- Faster stamping ramp-up time to mass production
- Up to 50% engineering time savings to resolve critical assembly and fit problems
- Savings in assembly fixtures maintenance using proactive detailed measurements
- Increased on-time quality report submissions
