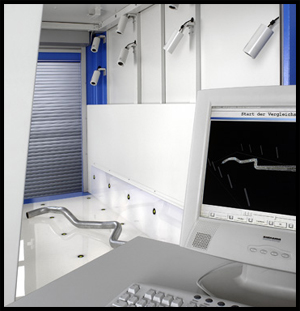
TubeInspect P16

TubeInspect P16, a non-contact measuring system, merely requires that the tube to be measured is placed in an optical measuring cell. Sixteen high resolution digital cameras with the latest GigE technology accurately measure the tubes geometry in a few seconds.
The tube does not need to be moved. The geometry is reported in an easily understandable way that is as sheath tolerance. The measuring range of TubeInspect P16 is 2,600 mm x 1,250 mm x 700 mm and this can be extended by repositioning the tube. TubeInspect P16 measures tubes with diameters ranging from 3 mm to 200 mm. Bends between 1° and 340° can also be measured easily. TubeInspect P16 has a newly added capability of measuring tubes with connected bends or with flexible parts.
TubeInspect P16 is also able to measure tubes with hose sections, shaped hoses, and hoses with fixtures or mounting attachments. Thus AICON extends the spectrum of optical measurement applications significantly. Tube measurements can be compared with a previously recorded sample part or with an imported CAD model.
TubeInspect P16 provides online corrections to bending machines
TubeInspect P16 may be directly linked to Computer Numerically Controlled (CNC) bending machines. If tube measurements indicate that adjustments need to be made to the tube manufacturing process, corrections are directly transmitted to the bending machine via the CNC program.
If no automatic transfer of correctional data is possible, the determined parameters (e.g. push, rotate and bend) are entered manually into the bending program. In either case the bending machine corrections will be made more quickly so that dimensionally correct tubes are produced with minimal waste. Machine set-up becomes predictable, and down time is drastically reduced.
| Request More Information | Product Brochure |
